Tag Archives: Photoshop Elements

Best photos of 2013: Skeleton

How often do you look back over the photos you’ve taken in a year? Do you look at them more because they’re on your computer than you would if you only had print outs? Does anyone out there find that creating photo books makes you look at your pictures in a different way?

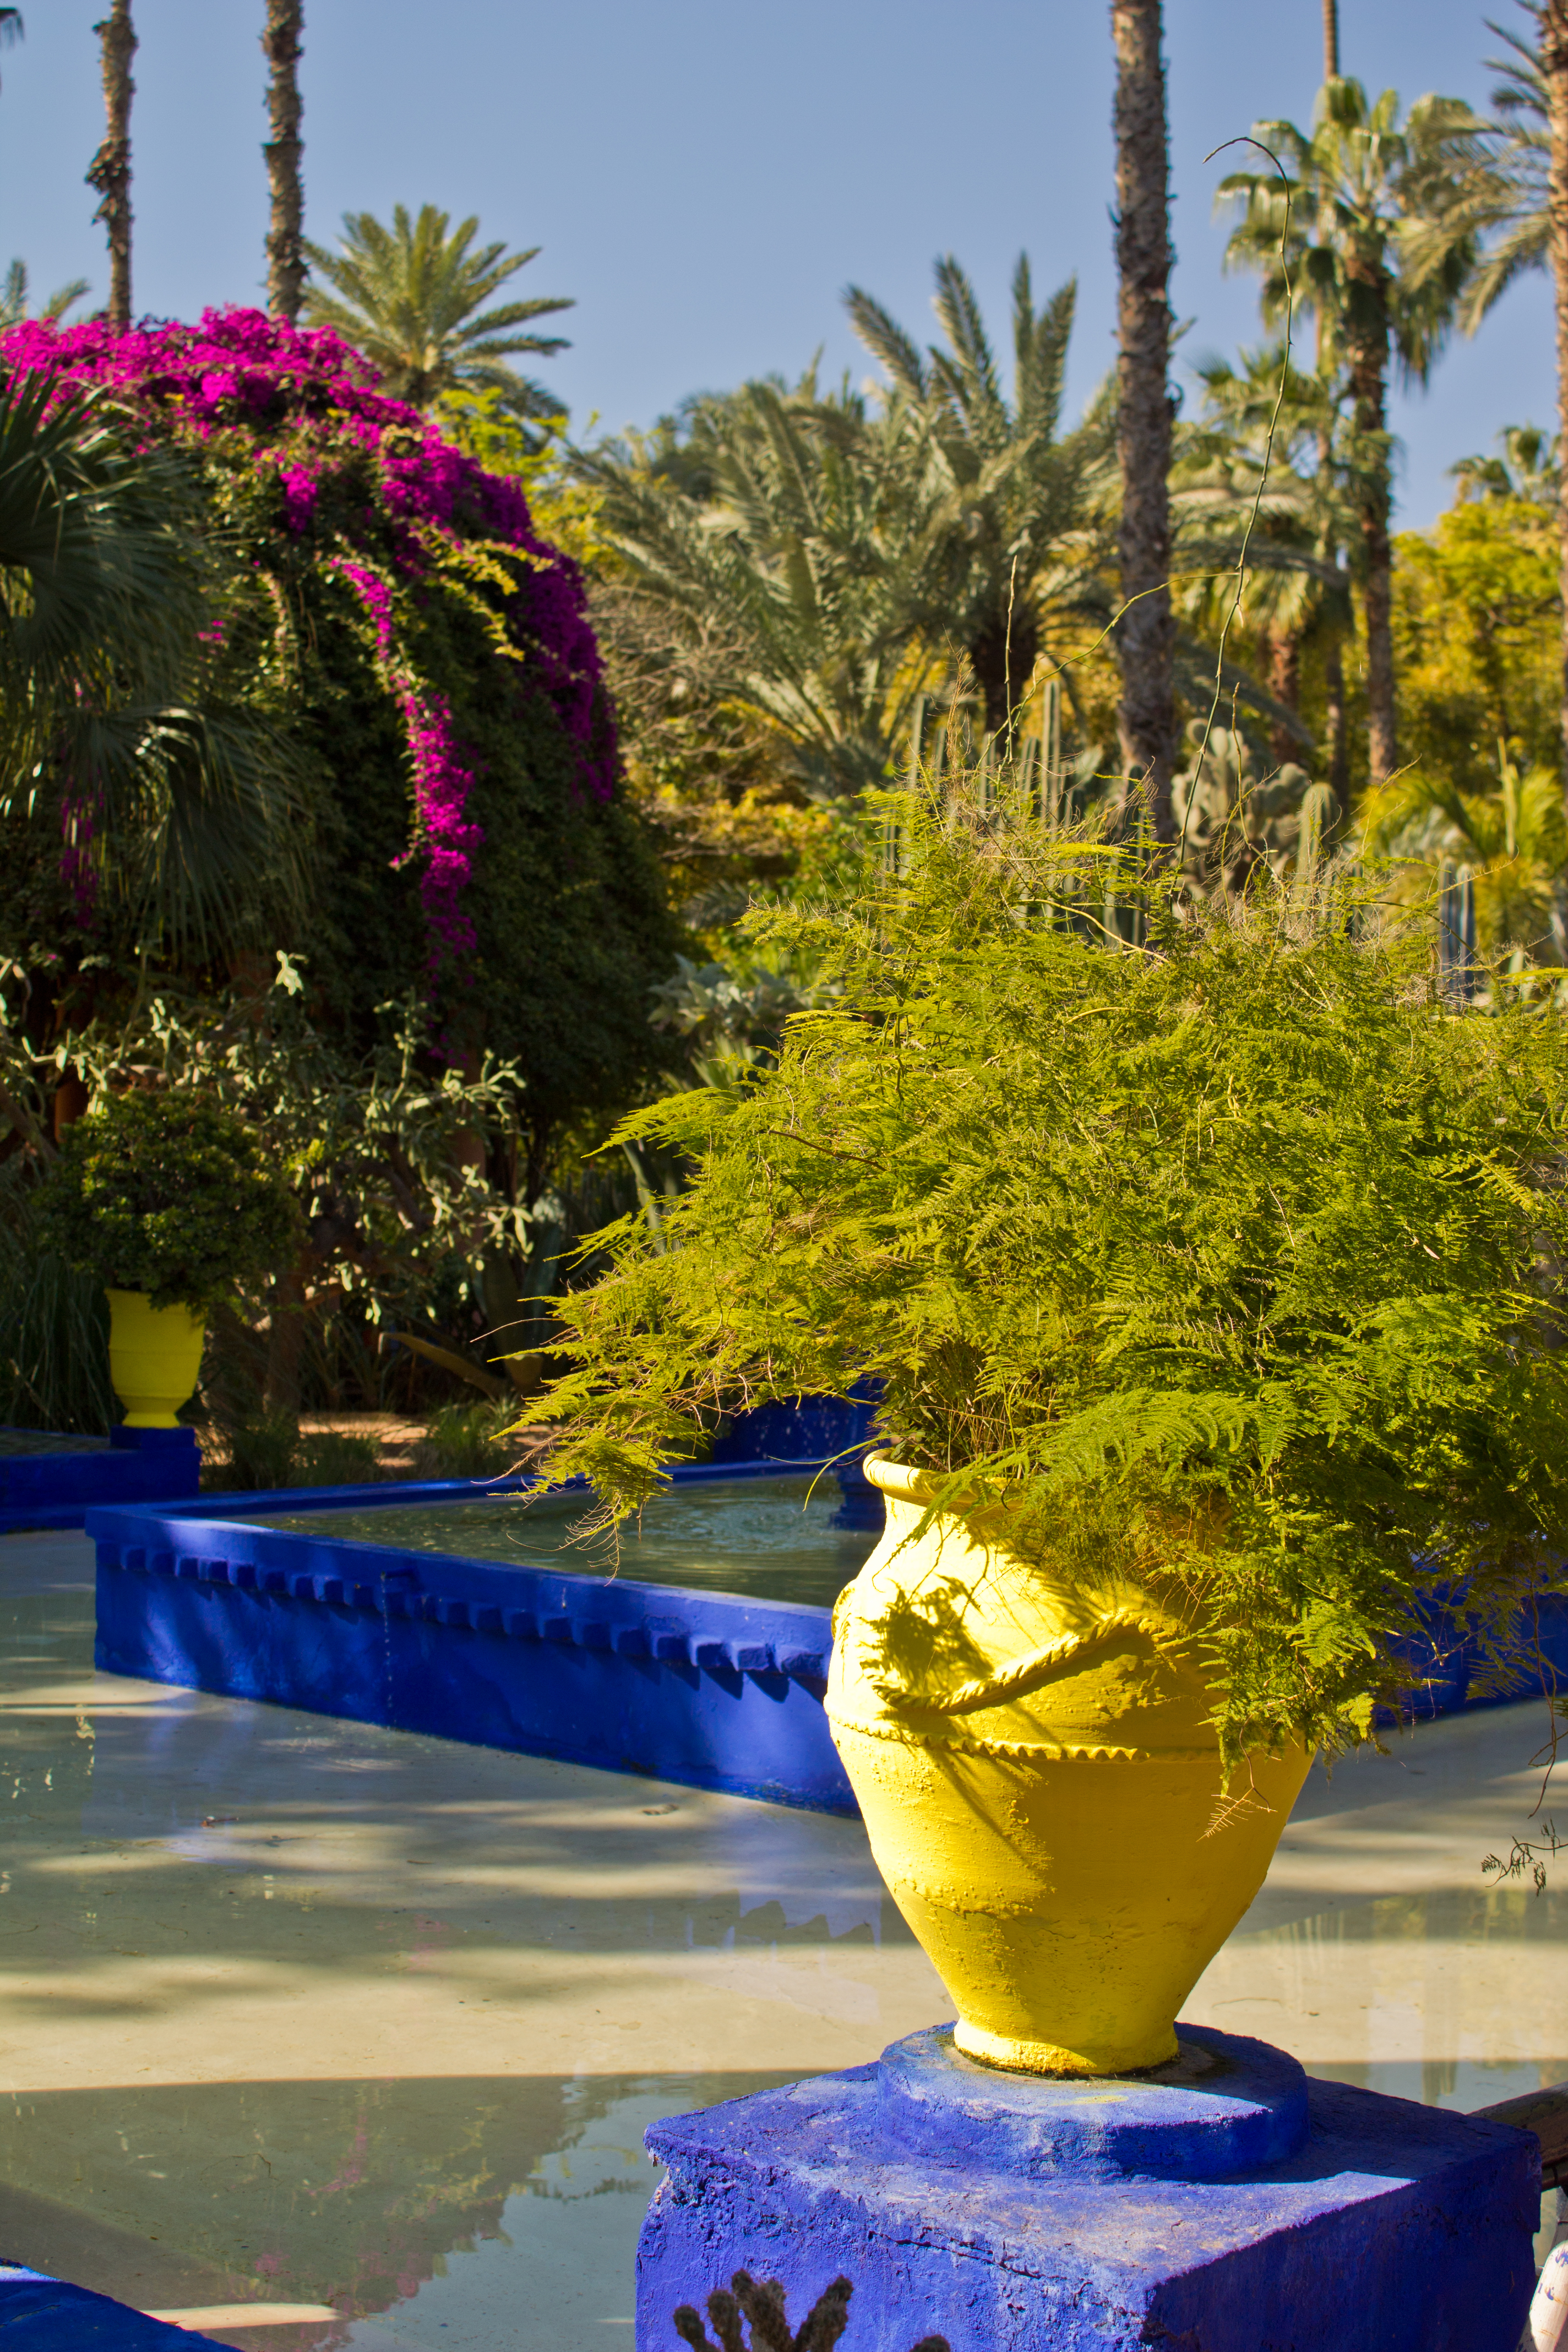
There are five weeks (and two days) until the end of the year, so I’ve decided to review my pictures from the year because I was lucky enough to go on three trips abroad – Marrakech, San Francisco and Tuscany. And in between I’ve taken odds and sods here and there. So for the next five weeks I’ll be posting two or three times a week with what I think are the best of this year’s crop.

Ghost © Carole Scott 2013
Ghost
© Carole Scott 2013

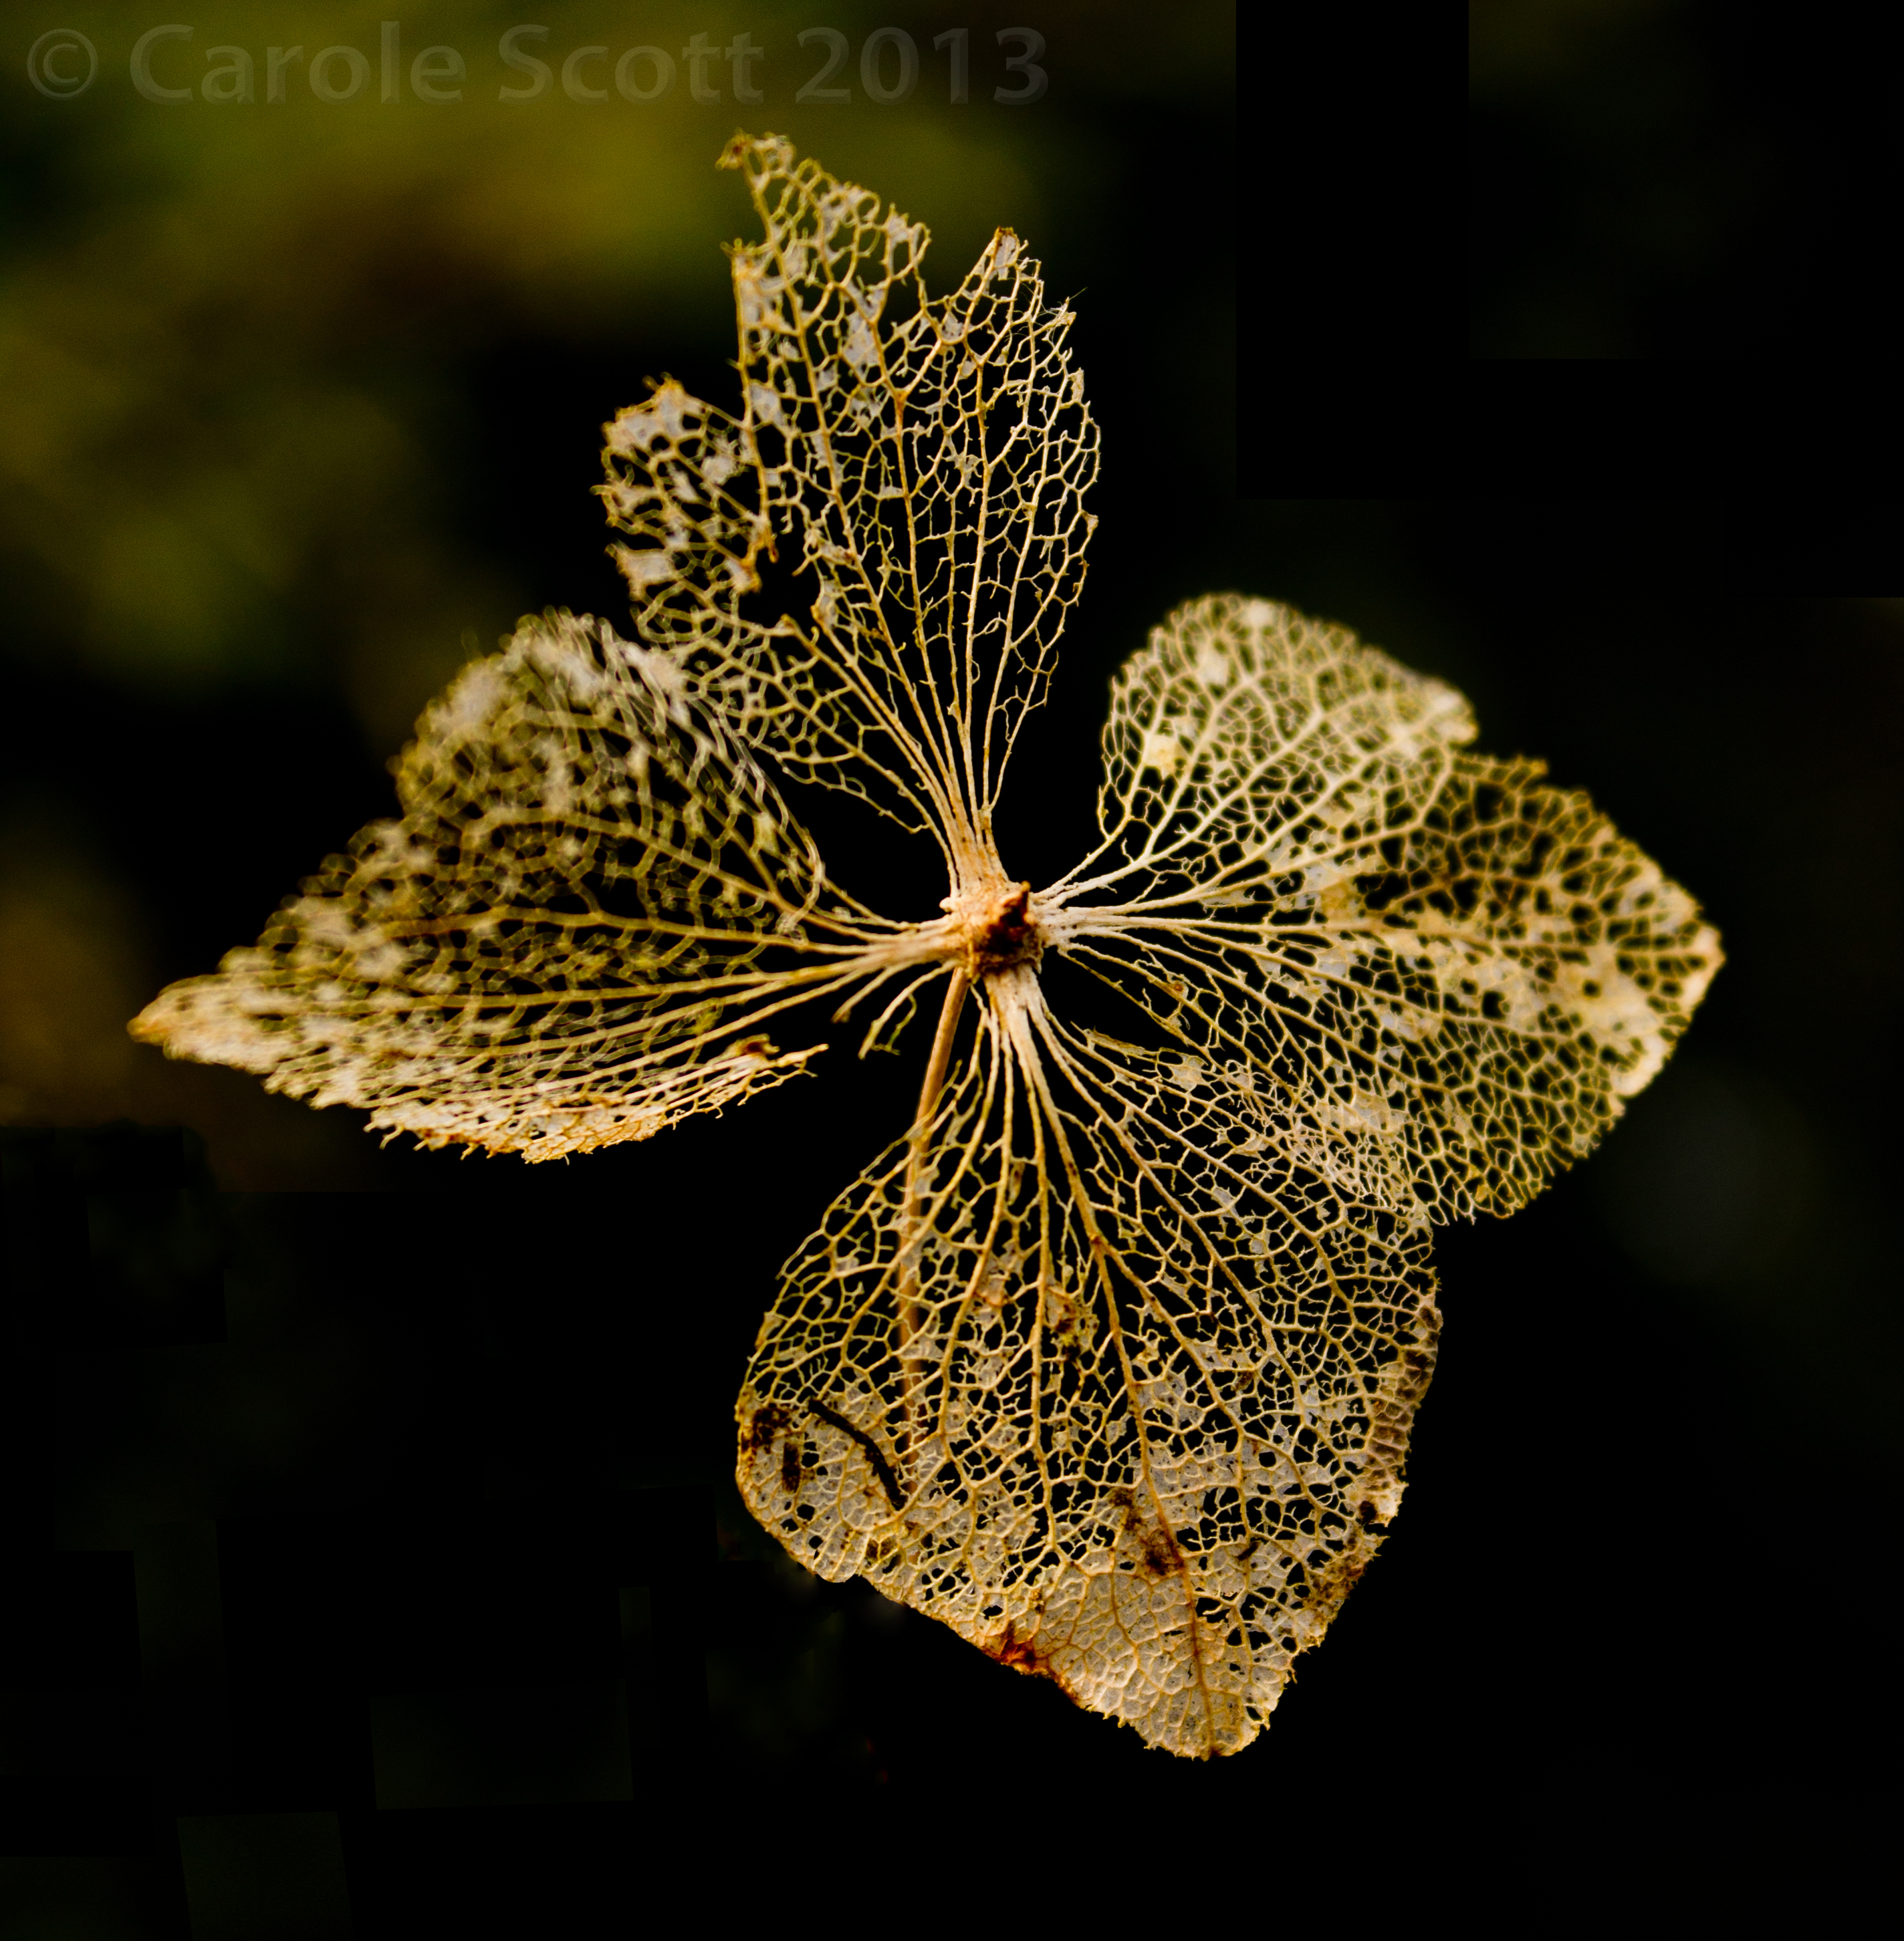
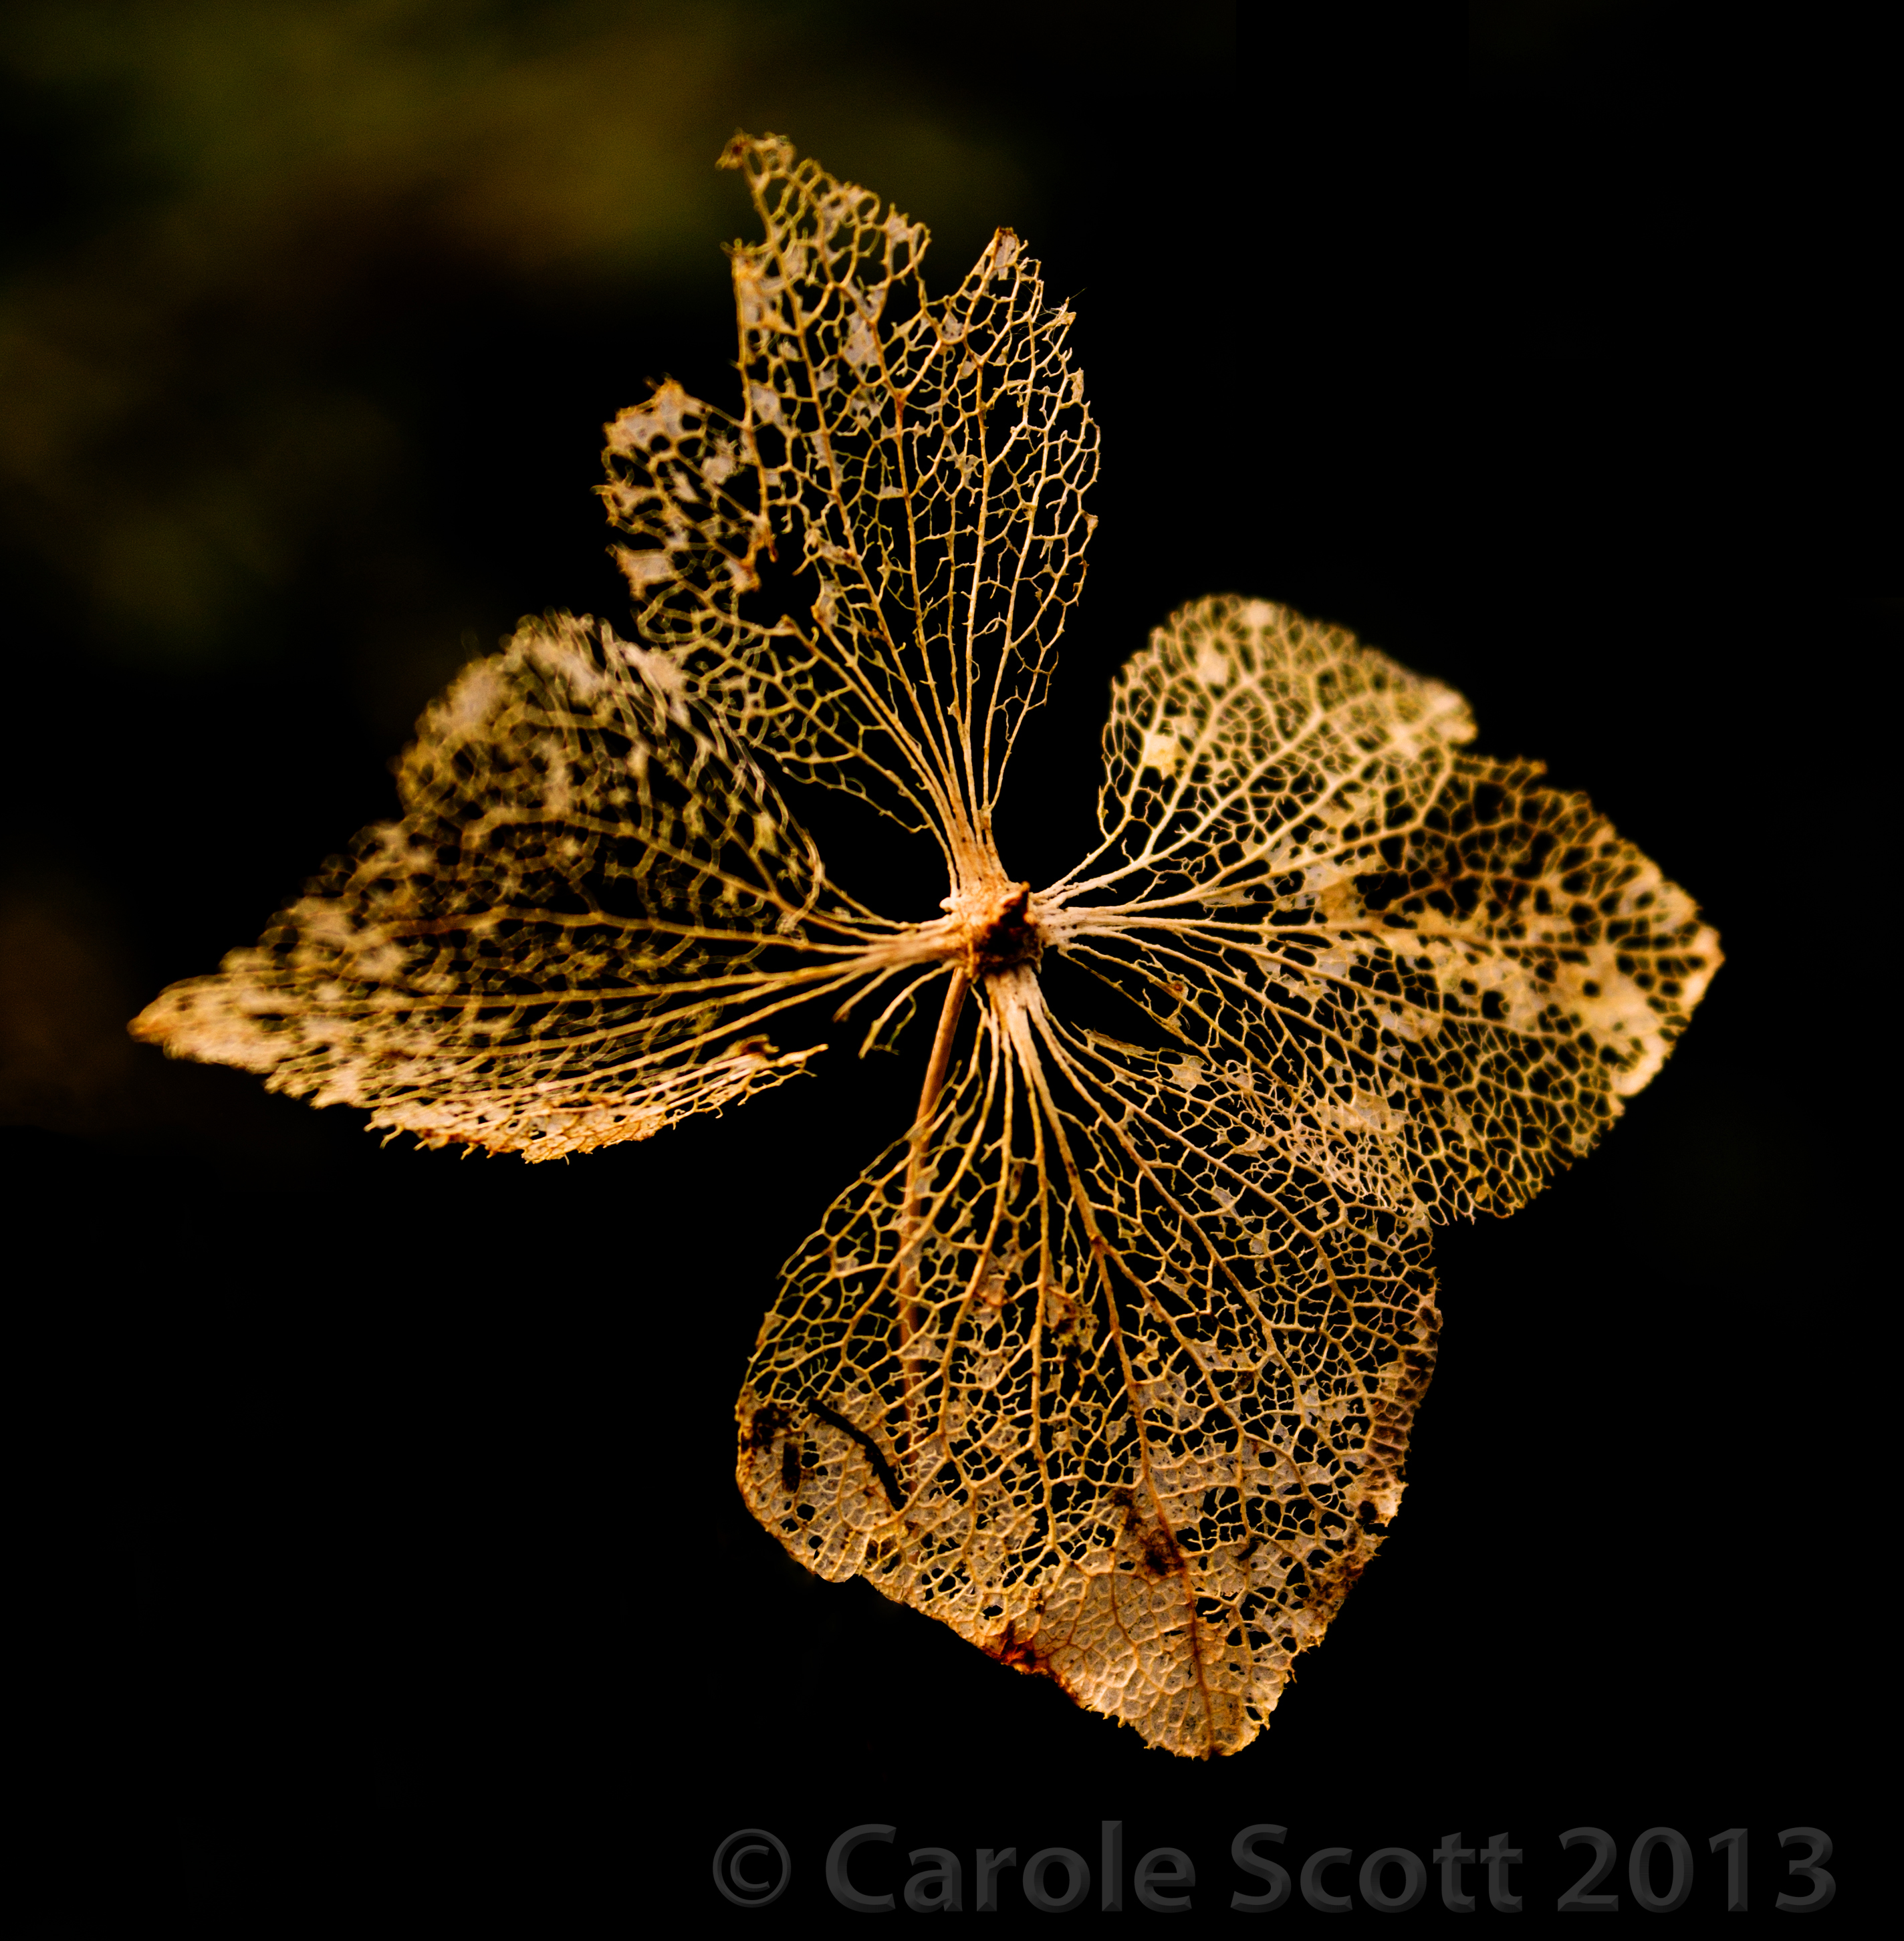
I went on a walking weekend to the Isle of Wight in January. By the Sunday I was a bit ‘grouped out’ and rather than joining the hike, I decided to hang back and enjoy the garden of the beautiful place we were staying in. The weather was glorious that morning: clear and crisp. My eye caught the delicate skeleton of these plants and I spent ages trying to the ‘just right’ shot. I really like the result.

There was work in photoshop – I blurred out the background so that the delicate tracery of veins could be more visible. I played with black and white/sepia but in the end a reduced hue and a darkened background as well as the blurring really worked.

By Carole Scott

Street photography: editing a chef

I have signed up to a great street photography community. I haven’t had a chance to take any new photos in the past couple of days (a woman has to put her nose to the grindstone, don’t ya know), so I have been revisiting older photos.

I have always loved this early one in my street photography ventures. I was shy of taking people’s photos but plucked up the courage to motion my camera at this chef taking a break, next to the back entrance of Arlington Arcade in London. I love the easy smile he gave me.

This was taken long before I had a good camera and photoshop, so I had a little play to see how I could improve it. I am so pleased with the results. I selected him and adjusted the lighting, contrast and sharpness on him in a new layer. Then, in a duplicate layer I reversed the selection and darkened the background as well as reducing the saturation. Finally I created a third layer and used a mixture of the clone stamp, spot healing and copying to get rid of the steel joist distracting the eye just behind his head.

This slideshow requires JavaScript.


By Carole Scott

Experiments in Photoshop: street smoker

I was in London at the weekend, to go to the excellent play, Peter and Alice. I didn’t get much time for photos before meeting my friend and I was disappointed by what I did snap. To make up for the lack of good photographs, I decided to have a truly creative play with one that I did take.

I won’t claim that the end result is a great photo but it was a good foundation from which to play.

It’s a ‘spot the difference’ for amateur photographers and burgeoning Photoshop Elements editors out there.

This slideshow requires JavaScript.

South Bank Skateboarders

Skateboarders and more at London’s South Bank….


By Carole Scott

Photoshop editing: learning all the time

I went to my Dad’s for lunch yesterday. He’s a fantastic amateur photographer and is in a camera club. This means that he has real motivation to get his editing ‘just so’.

I have been struggling with exposure recently – selective areas of photos taken in bright light being too bright, leaving shadowy areas with virtually no detail. I had started to use the ‘fill light’ slider in the RAW editor but Dad helped me even further with a quick tutorial in using the RAW editor a bit more thoroughly and then in Photoshop using the dodge and burn tools.

Here are some results. Dad rightly pointed out that many of my Inle Lake photos from Burma featured the fishermen in silhouette. While this can add drama, in these particular photos, that wasn’t necessarily the case here. Here’s the difference I’ve just made by using the ‘fill light’ (highlights) slider as well as the recovery slider to achieve detail in the background hills. I upped the contrast and also used the clarity slider gently.

Before:

Before - nice silhouette but lacking in detail throughout. © Carole Scott 2013
Before – nice silhouette but lacking in detail throughout.
© Carole Scott 2013

After:

After: more colour/detail in the fisherman and in the background hills?

Using the dodge and burn tools, I managed to get rid of some of the distracting overblown exposure in these photos. In the first one, it’s the yellow urn that was way too bright. I used the magnetic lassoo to grab the area of the urn I wanted to work on and then used the burn tool to take some of the brightness off. The upshot is that the leaf curling down is now also in contrast and more visible. It’s a tiny bit of work but it makes a big difference to the viewing experience.

Before:

© Carole Scott 2013
© Carole Scott 2013

After:

© Carole Scott 2013
© Carole Scott 2013

I’m still learning, so the results will be patchy for a while, I’m sure. Any other tips gratefully received!

By Carole Scott

P.s. Here’s another great edit I’ve done since writing this post – cooled the temperature a tiny bit (from a tip in the April edition of Digital Photo), and reduced the blare on the white t-shirt by using recovery and the burn tool

Before:

© Carole Scott 2013
© Carole Scott 2013

After:

© Carole Scott 2013
© Carole Scott 2013

Winter’s Ghost

I was in the Isle of Wight a few weeks ago for a walking and Burns’ Night weekend. I took lots of photos but this was by far and away my favourite.

I’ve created a few different edits of it and I’d love to know which is the best, so do let me know if you have an opinion! Thanks.

Winter's Ghost, original edit
Winter’s Ghost, original edit
Winter's Ghost II
Winter’s Ghost II
Winter's Ghost III
Winter’s Ghost III
Winter's Ghost IV
Winter’s Ghost IV

By Carole Scott

Photoshop: learning new things

I have been playing around and learning in Photoshop Elements today. There is a fantastic selection of useful tutorials online.

I liked this one, teaching how to take a double exposure

I had to have a go, so I took one of the Bagan Balloon ride pics and put me in it – it’s a pic taken when I did a tandem skydive. It has really made me smile and has given me lots of ideas for birthday cards for friends!

Skydiving over Bagan would be a dream come true!  © Carole Scott 2013
Skydiving over Bagan would be a dream come true! © Carole Scott 2013

By Carole Scott

How to create a watermark brush in Photoshop Elements. | Everyday Elements

I was thinking this morning about the issue of making sure my photos are protected now that I’m sharing them on a blog.

A quick Google search is always a great place to start and I found this incredibly helpful step by step instruction from Everyday Elements.

How to create a watermark brush in Photoshop Elements. | Everyday Elements.

What I now want to know from photography bloggers out there is how do I come up with a way of doing this in bulk or quickly when I have a selection of images that I want to upload to a blog. It’s a great process but it’s time consuming, particularly since I have big files and already have to spend the time reducing the size of them before uploading to my blog!

Anyone with any answers, please help!

P.S. Just found the ‘process multiple files’ function in Elements. So pleased, as it has the option to add a Watermark and resize, all in one handy place. Here’s one of the pics I just processed. It does spoilt the image a bit, so perhaps I need to make it less opaque….

Blog001

Second attempt…

Bagan01

That’s better. What do you think?

By Carole Scott