
I went to my Dad’s for lunch yesterday. He’s a fantastic amateur photographer and is in a camera club. This means that he has real motivation to get his editing ‘just so’.
I have been struggling with exposure recently – selective areas of photos taken in bright light being too bright, leaving shadowy areas with virtually no detail. I had started to use the ‘fill light’ slider in the RAW editor but Dad helped me even further with a quick tutorial in using the RAW editor a bit more thoroughly and then in Photoshop using the dodge and burn tools.
Here are some results. Dad rightly pointed out that many of my Inle Lake photos from Burma featured the fishermen in silhouette. While this can add drama, in these particular photos, that wasn’t necessarily the case here. Here’s the difference I’ve just made by using the ‘fill light’ (highlights) slider as well as the recovery slider to achieve detail in the background hills. I upped the contrast and also used the clarity slider gently.
Before:

© Carole Scott 2013
After:

Using the dodge and burn tools, I managed to get rid of some of the distracting overblown exposure in these photos. In the first one, it’s the yellow urn that was way too bright. I used the magnetic lassoo to grab the area of the urn I wanted to work on and then used the burn tool to take some of the brightness off. The upshot is that the leaf curling down is now also in contrast and more visible. It’s a tiny bit of work but it makes a big difference to the viewing experience.
Before:
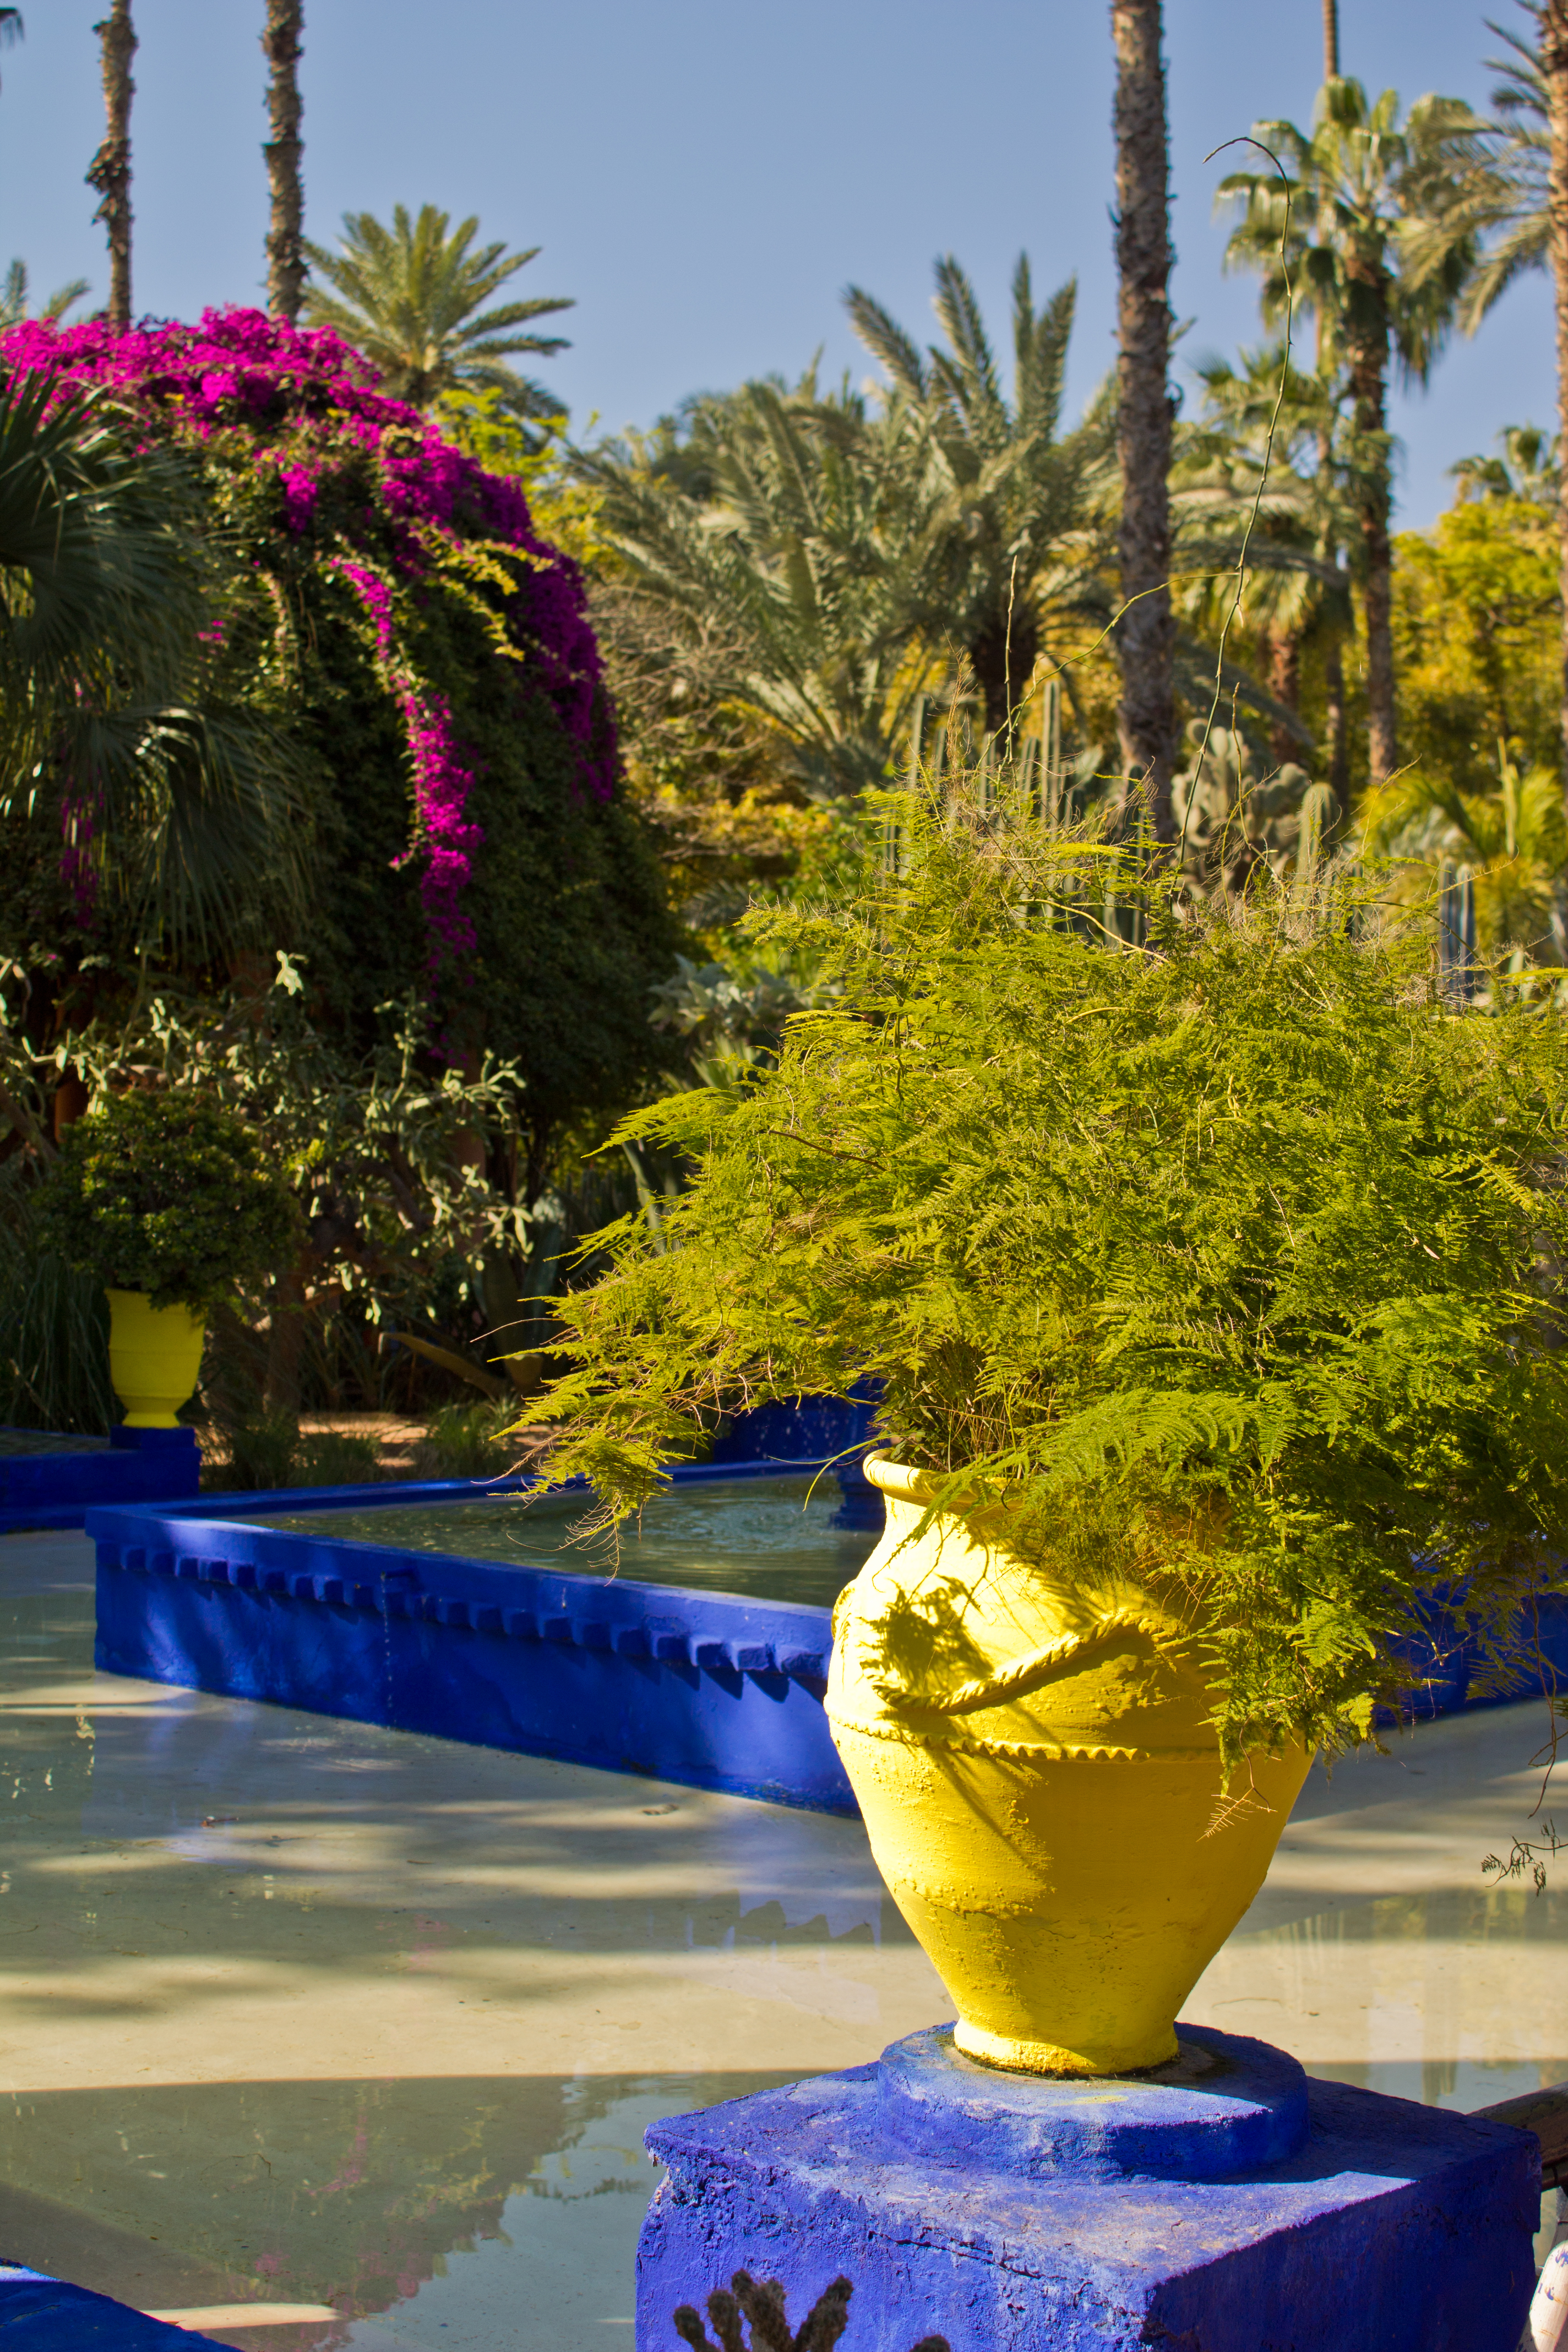
After:

I’m still learning, so the results will be patchy for a while, I’m sure. Any other tips gratefully received!
By Carole Scott
P.s. Here’s another great edit I’ve done since writing this post – cooled the temperature a tiny bit (from a tip in the April edition of Digital Photo), and reduced the blare on the white t-shirt by using recovery and the burn tool
Before:

After:

Related articles
- How To Dodge & Burn In Photoshop With Elena Jasic (jayclappphotography.wordpress.com)
- Luminosity – Photoshop Techniques (Part 1 of 2) (blogarithms.com)
- The Best Dodging and Burning Technique! (sydspix.wordpress.com)
